On this page
Table of Contents
This page is the main hub for electrical materials, tools, and calculators. From wire types, breakers, and junction boxes to tool selection and load calculations, everything starts here. All detailed guides, comparisons, and step-by-step calculators link back to this pillar.
Quick answer: what this residential electrical materials list will give you
If you want to learn electrical work in your first 0–3 months, this residential electrical materials list is the part you can’t skip.
This article gives you a simple, beginner-friendly
“residential electrical materials list” that works like a map:
Important: This guide is for learning how to recognize residential electrical materials and plan small projects. It’s not a step-by-step wiring manual. Always shut off power, follow the National Electrical Code® (NEC) and local rules, and bring in a licensed electrician when work goes beyond like-for-like replacement.
Introduction: Why learn “materials” before tools and techniques?
Learning electrical work often starts with this picture in your head:
- holding a drill or crimping tool, running conduit across a ceiling
- replacing outlets and light fixtures, cleaning up messy wiring
But the moment you step into a real electrical supply house or the electrical aisle at Home Depot, you quickly realize:
If you don’t understand the materials, you can’t make good decisions — even if you’re strong enough to hold every tool.
For something as “simple” as adding one new receptacle, you immediately run into questions like:
- What wire size should I use? 14 AWG or 12 AWG?
- Should this run go in plastic conduit, metal conduit, or surface raceway?
- Do I need a flush box or surface-mount box here? Is there a junction box somewhere in between?
- Which receptacle should I buy — GFCI, tamper-resistant, weather-resistant, USB combo?
This guide is the article you can read before you walk into the store — your personal Residential Electrical Materials List 101 that you can reuse on every project:
- first, understand the basic types, uses and differences
- then, walk through a few real-world scenarios (replace an outlet, pull a new circuit, add a workstation strip, work in a bathroom)
- so you can see which materials tend to show up in which type of job
In your 0–3 month stage, treat this as your materials recognition starter kit:
- you don’t have to remember every catalog number
- you just need to recognize the names and know roughly where they’re used
Later — whether you stay at the DIY/homeowner level or move toward apprentice electrician / site supervisor — this materials map will stay useful.
In the bigger Engineer Tsai system, this article will eventually connect to:
- “materials kits” (for example: standard outlet replacement kit, “add one receptacle” kit)
- starter toolkits (which tools actually match which basic materials and jobs)
- a future “job notebook” / materials library, where you log which brands and specs you’ve used on each job
1. Residential electrical materials list: a simple map of how supplies fit together
Don’t start by memorizing product names.
Start with a big picture map.
I like to split the everyday items on a residential electrical materials list into three groups:
- Things that bring power to a location
- conductors and cables (branch-circuit wiring)
- panelboards and breakers
- Things that protect and route the wiring
- conduit (PVC or metal)
- surface raceways
- all the fittings, clips and boxes that keep things neat and protected
- Things you can see and touch
- outlets (receptacles) and switches
- visible parts of the panel and cover
- fixtures and fans (in this article we’ll mostly mention them in passing)
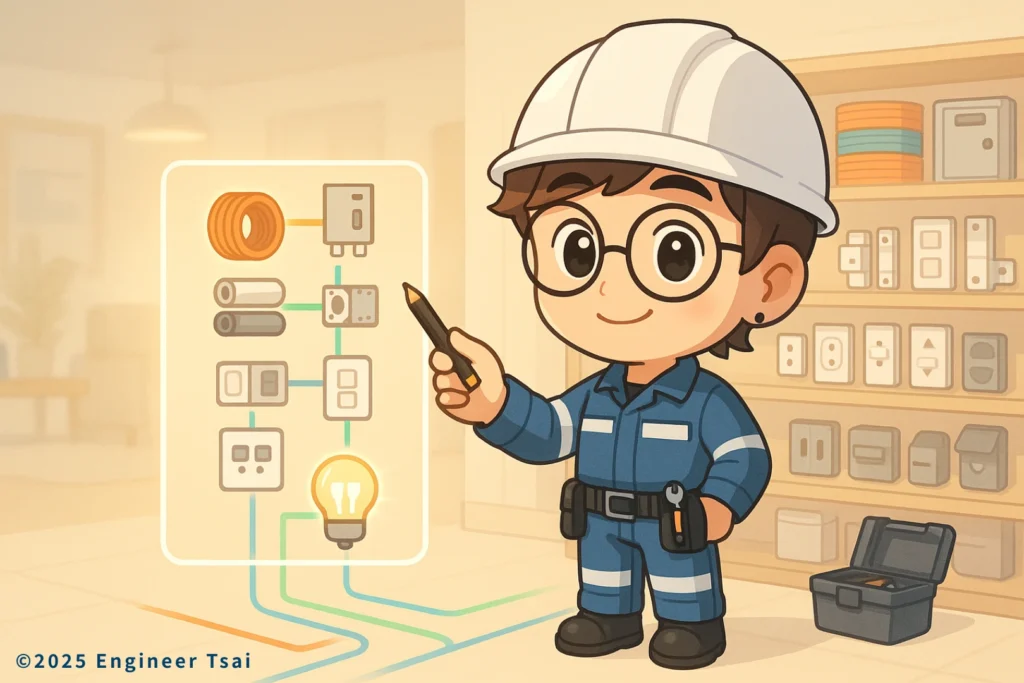
If you can understand the chain
“wire → conduit / raceway → box → outlet / switch → panel”,
the shelves at an electrical supply house will stop feeling like random chaos.
2. Getting power to every corner: branch-circuit wiring and the panel
2.1 Wires: the “blood vessels” of your home
In a typical U.S. home, you’ll mostly see two categories of conductors, which form the backbone of any residential electrical materials list:
- Building cable (for example, NM-B “Romex”)
- Flexible cords and extension cords for portable equipment
For beginners, you’ll constantly bump into branch-circuit cable sizes like:
- 14 AWG copper – often used on 15 A lighting or small appliance circuits
- 12 AWG copper – often used on 20 A general-purpose receptacle circuits
- 10 AWG copper and larger – for higher-load appliances like electric water heaters, dryers, ranges, etc.
⚠️ Important safety note
The exact allowed wire size, breaker rating and load are governed by your local code and the National Electrical Code® (NEC).
What you see above are common U.S. practice examples, not legal design rules.
Always confirm with the NEC, local amendments, permits, and/or a licensed electrician before you build or modify circuits.
Typical U.S. color conventions
In many U.S. residential systems, you’ll often see:
- black / red – hot conductors (L)
- white or gray – neutral (N)
- green or bare copper – equipment grounding conductor (EGC)
Older homes may not follow modern color conventions perfectly, so:
Never rely only on color to identify conductors.
Use a non-contact voltage tester or meter, and when in doubt, have a licensed electrician verify.
In future materials kits, you might see something like:
NM-B 12/2 with ground, 50 ft – standard 20 A receptacle circuit starter kit
You don’t have to decode every part number yet.
For now, remember this simple rule:
Conductor size → how much current it can carry
Insulation & cable type → where it can be installed (dry, damp, in walls, underground, etc.)
2.2 The panel and breakers: the “command center” of your materials
Inside a typical residential panel (load center) you’ll find:
- a main breaker (or service disconnect) that can shut off power to the whole panel
- several branch-circuit breakers (for rooms, appliances, outdoor circuits, etc.)
- often one or more GFCI or AFCI breakers, or combination devices
From a materials point of view, pay attention to:
- panel size and spaces – if you want to add new circuits in the future, you need physical and ampacity space
- breaker ratings – 15 A, 20 A, 30 A and so on, which must be matched properly with wire size and load
- protection type – standard thermal-magnetic, GFCI, AFCI, or combination GFCI/AFCI, especially in kitchens, bathrooms, bedrooms and outdoor areas
When you think about future “small jobs” like:
- adding a new dedicated circuit for a receptacle or tool
you’ll start asking:
- does the panel have spare spaces?
- do I need a tandem breaker (if allowed) or a sub-panel later?
- do code requirements here call for AFCI or GFCI protection?
This “panel layer” will keep coming up in future articles on home electrical safety and how to read your breaker panel.
⚠️ Safety reminder
This article is meant to help you recognize materials and ask better questions,
not to teach you how to rewire a panel on your own.
Any work inside a live panel, adding circuits, or feeding large loads should be done by a licensed electrician under local code.
3. Protecting and routing conductors: conduit, raceways and boxes
3.1 PVC and metal conduit: giving wires a safe path
PVC conduit (plastic)
- commonly used for underground runs and sometimes for exposed work in garages or basements
- lightweight, corrosion-resistant and relatively inexpensive
- assembled with solvent cement and fittings
Metal conduit (EMT, rigid, etc.)
- better impact resistance, often used in:
- garages, workshops, exposed walls
- commercial spaces or areas where the wiring might get bumped
- a bit heavier and more work to install, but very durable
- can also serve as an equipment grounding path when installed correctly
For a beginner, keep this simple mental shortcut:
Hidden in walls/ceilings in a typical U.S. home → often NM-B cable (no separate conduit)
Exposed and likely to be bumped → often EMT or surface raceway
(Exact choices depend heavily on local code and construction style. The key point: protect the conductors appropriately.)
3.2 Surface raceways: tidy “hallways” for exposed wiring
Surface raceway is the white or beige “wire hallway” you often see stuck to the wall in offices:
- perfect for adding outlets and data lines in finished spaces
- avoids opening walls or ceilings
- comes in different widths/heights; some are rated to separate power and low-voltage
On a materials list, you might see something like:
Surface raceway 1" × 2", 6 ft × 3 lengths + inside/outside corners and end caps
Whenever you see “raceway + boxes + outlets,” you can imagine:
“We’re adding new points along an existing circuit, without tearing the whole wall open.”
3.3 Boxes: where all the wiring meets
Flush boxes (in-wall boxes)
- most switches and receptacles in finished walls are mounted in these
- branch-circuit cables enter the box, then connect to devices
- box size matters for fill capacity (how many conductors and devices are allowed)
Surface-mount boxes
- used when conduit or raceway is exposed on the wall
- common in basements, garages, workshops, sheds
Junction boxes
- the transition or splice points between cables and conduit runs
- from the outside they just look like a blank cover,
but inside they’re often critical hubs for the whole circuit
Misusing junction boxes (overfilling, hidden in inaccessible places, sloppy splices)
is one of the easiest ways to create future problems.
In a future materials pack, you might see something like:
(3) single-gang old-work boxes + (2) 4" square junction boxes with covers
which tells you:
this small job will add three device locations plus two critical junction points.
4. The visible layer: outlets, switches and panel covers
4.1 Outlets: from “it works” to “it fits this spot”
Common things to check when you choose receptacles:
- 2-slot vs 3-slot – is there a ground connection?
- 15 A vs 20 A rating – match the circuit rating and wire size
- GFCI / tamper-resistant / weather-resistant – especially in kitchens, bathrooms, outdoors and other code-required locations
- feature receptacles – with USB ports, indicator lights, switches, timers, etc.
Real-world differences:
- refrigerators, microwaves and heavy kitchen appliances
→ often on 20 A circuits with 20 A, 3-slot receptacles (or per local code) - bathroom receptacles
→ GFCI required in most modern codes, often in a weather-resistant device or cover - living rooms and bedrooms
→ number and placement often matter more than raw specs
Brand examples you might see on U.S. shelves (no specific endorsement here):
- receptacles and switches: Leviton, Lutron, Eaton, Schneider, etc.
- breakers and panels: Square D, Siemens, Eaton, GE, and more
The point is not to memorize every brand and model, but to build this habit:
“What will be plugged in here?
How much current?
Is this area damp or outdoors?
Do I need GFCI, AFCI, tamper-resistant, or weather-resistant?”
4.2 Switches: more than just a button
Switches may look similar from the outside, but you’ll quickly meet a few basic types:
- single-pole / double-pole
- 3-way / 4-way (control a light from two or more locations)
- single-gang / multi-gang
- switches with indicators, timers, dimmers or smart controls
And one easily forgotten dimension:
- environment rating – damp, wet, outdoor locations often require devices with higher NEMA/IP ratings or special covers
If you build the habit of checking the voltage, current rating and environmental markings on the box,
you’ll stop choosing switches only by “looks nice.”
4.3 Panel appearance and accessories
The inside of a panel is critical, but so are the cover and accessories:
- panel size and number of spaces – will you want to add circuits later?
- metal vs plastic covers, with or without key locks
- blank fillers for empty breaker slots
These issues will show up again in a separate “home breaker panel basics” article. For now, just keep in mind:
The panel itself is also a material you choose,
not just a random gray box the builder picked.
5. Five real-world scenarios: putting materials into context
Names on a residential electrical materials list can feel abstract. Let’s look at real situations you’ll likely face.
5.1 Scenario 1 – “I’m just replacing one outlet”
Many people think “replacing a receptacle” means you only need one device. In reality, you often need:
- the new receptacle (correct rating and type)
- a matching wallplate (if the old one is yellowed or cracked)
- the right screws and mounting hardware
- if the old conductor ends are badly oxidized, you may need to trim and re-strip the wire
At that point, you start to see:
“Oh, so this little bag of screws, the wallplate, the device —
they’re all part of the materials list for what looks like a tiny job.”
Later, if we publish a “standard outlet replacement kit,” it will look very similar to the list you’re already thinking through here.
5.2 Scenario 2 – pulling a new circuit from the panel to a new receptacle
For this, a typical material combo might include:
- the right NM-B cable (for example, 12/2 with ground for a 20 A circuit, if code-compliant)
- appropriate conduit or raceway where required (garage, basement, outdoors, or as local code demands)
- necessary elbows, couplings and connectors
- a flush box or surface-mount box at the new outlet location
- the new receptacle and wallplate
- a new breaker in the panel (type and rating chosen by a licensed electrician under code)
You can think of branch-circuit design as answering three questions:
- Where will the conductors run? – cable, conduit or raceway path
- Where will they come out? – which boxes and device locations
- Who will use the power there? – what loads and receptacles
Once you start to think like that, a materials list becomes a very clear story instead of a pile of part numbers.
5.3 Scenario 3 – adding a workstation power strip with raceway
If you do side projects, 3D printing or computer work, you’ve probably had this thought:
“There are never enough outlets near my desk.”
In that case, your materials list might look like:
- a run of surface raceway (for example 1″ × 2″)
- raceway inside and outside corners and end caps
- a few surface-mount boxes or raceway-compatible device boxes
- several receptacles
- a short run of cable connecting back to an existing junction box or circuit (designed and installed per code)
This kind of job often doesn’t require opening walls,
but it does require you to think harder about:
“Is the total load on this existing circuit getting too high?”
That’s a materials question and a load calculation question at the same time.
5.4 Scenario 4 – bathrooms, outdoors and other high-risk areas
Bathrooms, laundry rooms, garages, kitchens and outdoor spaces add extra constraints:
- do the receptacles and switches need GFCI or to be protected by a GFCI breaker?
- do you need weather-resistant (WR) or in-use covers for receptacles?
- are boxes and mounting methods appropriate for damp / wet / corrosive environments?
- are fans, heaters or other fixtures wired according to the manufacturer’s instructions and ratings?
A materials list here might mention:
- GFCI receptacles or GFCI breakers
- weather-resistant or weatherproof covers and boxes
- devices with higher NEMA/IP ratings
All of these “just look like different boxes and devices,”
but what you’re really doing is pulling water and electricity further apart in a smart way.
5.5 Scenario 5 – reading a materials list on a small remodel
As you move from “fix my own place” to “help family and friends” or assist on small jobs, you’ll start seeing full materials lists (BOMs) like:
(2) rolls NM-B 12/2 with ground
(20) ft 1/2" EMT + assorted elbows and couplings
(6) single-gang old-work boxes + (4) surface-mount boxes
(12) 15 A or 20 A receptacles + (6) switches
(1) load center expansion kit + (3) new breakers (per code)
If you’ve gone through this Electrical Materials 101 guide, you won’t just stare at the codes. You’ll start asking:
- does this list match the loads and environment we actually have?
- is there room for future expansion in the panel and raceways?
- is anything here clearly “cutting corners” on safety just to save a few dollars?
That’s the first real step from “I can DIY simple things” to “I can read and discuss a job with pros”.
When you do get hands-on, treat this guide as a way to recognize materials and ask good questions,
not as a replacement for licensed electricians, inspections and permits.
6. From a residential electrical materials list to your own materials library
This residential electrical materials list is meant to draw a simple map in your head:
- get familiar with the most common conductors, conduits, boxes, outlets, switches and panels
- understand roughly which job types use which materials
- start thinking in terms of load, environment and protection level instead of just “it looks okay”
In the broader Engineer Tsai roadmap, this connects to:
- materials kits like:
- standard outlet replacement kit
- “add one receptacle” kit
- small workstation power kit
- starter toolkits tied to those materials:
- what tools you actually need for small home jobs versus over-buying everything
- a job notebook / materials library where you track:
- which brands and specs you used on each project
- what worked well and what you don’t want to buy again
As you move toward larger projects — commercial spaces, shops, even industrial or high-tech facilities — you’ll see more advanced items: busways, cable tray, clean-room fittings, anti-static flooring and so on.
But with this 101 map in place, you’ll notice:
Even those “advanced” materials are built on the same backbone:
how to bring power to the load, how to protect the conductors,
and how to let people use electricity safely.
In your first 0–3 months, you don’t need to memorize every catalog number.
If you can walk into a supply house and recognize what’s on the shelves and what it’s for,
you’re already several steps ahead of most people who only say,
“I’ll just let the electrician handle it.”
Over time, this basic residential electrical materials list can become:
- your pre-job checklist
- and the starting point for how you plan, price and document every future project.
7. Where do you actually buy these materials in the U.S.?
Recognizing the items on this residential electrical materials list is step one. Step two is asking:
“Where should I actually buy all this?”
In the U.S., you’ll typically run into four kinds of places:
- Local electrical supply houses
- primarily serve contractors and pros
- best for advice on products and code, can look up spec sheets with you
- sometimes require an account or minimums, but many will sell to serious homeowners too
- Big-box home centers
- the Home Depot / Lowe’s type chains
- convenient, clear pricing, easy returns
- great for common residential materials,
but limited for specialized or heavy-duty items
- Neighborhood hardware stores
- smaller selection, but handy for basic repairs
- often helpful staff who know what local homes usually need
- Online retailers
- from general marketplaces to dedicated electrical supply sites
- huge variety, but you need to be extra careful about:
- authentic products
- correct ratings (voltage, current, listing marks)
- reputable sellers
In the Engineer Tsai roadmap, this guide will eventually connect into a “materials map tool”:
- For the same job type, what’s the usual materials list?
- Which nearby suppliers tend to stock those items?
- What did you actually buy and use last time, and how did it perform?
This article is the first layer of that future system:
a way to organize the world of electrical supplies into a few memorable drawers in your head.
For official safety and code requirements in the U.S., always refer to:
FAQ: residential electrical materials list for U.S. homes
I’m a complete beginner. Which residential electrical materials should I learn first?
Start with the backbone of most U.S. homes: branch-circuit cable (like NM-B 14/2 and 12/2), basic boxes (old-work and junction boxes), standard receptacles and switches, and your main breaker panel. If you can recognize those on a shelf and roughly know where they’re used, you’re already ahead of most homeowners.
Can I buy residential electrical materials from a pro supply house, or should I stick to big-box stores?
Many electrical supply houses will sell to serious homeowners, especially if you come prepared with a clear materials list. Big-box stores like The Home Depot or Lowe’s are great for common residential materials and small projects. Supply houses really shine when you need help comparing products, reading spec sheets, or matching what a local electrician typically uses.
Is it safe to buy electrical materials online?
Online retailers can be convenient, but you have to be more careful. Make sure products are listed or certified for use in the U.S. (look for marks like UL or ETL), match the correct voltage and current ratings, and come from reputable brands or sellers. When in doubt, compare with what you see at a local supply house or ask a licensed electrician before you install anything.
Do I need a permit or a licensed electrician for small jobs like replacing an outlet?
Rules vary by city and state. In many U.S. jurisdictions, like-for-like replacement of a receptacle or switch may not require a permit, but adding new circuits, changing the panel, or running new wiring usually does. This guide is meant to help you recognize materials and ask better questions, not to replace permits, inspections, or licensed electricians. Always check with your local building department and follow the National Electrical Code® (NEC) and local amendments.
How does this residential electrical materials list fit into my 0–3 month electrician learning plan?
In your first 0–3 months, your main goal is recognition, not perfection. Use this residential electrical materials list as a map: learn what common residential electrical materials look like, where they’re used, and how they connect in simple scenarios like “replace one outlet” or “add one receptacle.” Later, when you move into hands-on training, code study, and supervised work, you’ll already speak the same “materials language” as the pros.
📌 Recommended next reading
🔹Home electrical safety: the real 0–3 month starting point
Before you think about buying tools, map out your home’s electrical risks: short circuits, aging wiring, leakage and power outages.
🔹0–3 month electrician roadmap: start with your own home
Turn “understand my own wiring and panel” into a 90-day mini project, so you can see whether the electrician path actually fits you.
🔹Home breaker panel and power-outage playbook
Learn how to read your breaker panel, handle common outage scenarios and see where panels and breakers fit on the materials map.
Read next in this topic
- Beginner’s Guide: Five Electrical Tools That Make Home Maintenance Easy
- How to Use a Multimeter: 7 Steps to Measure Voltage and Current Safely
- How to Use a Voltage Tester Safely: 3-Step Guide Before You Touch Any Wires
- Residential Electrical Materials 101: A Beginner-Friendly Materials Map