On this page
Table of Contents
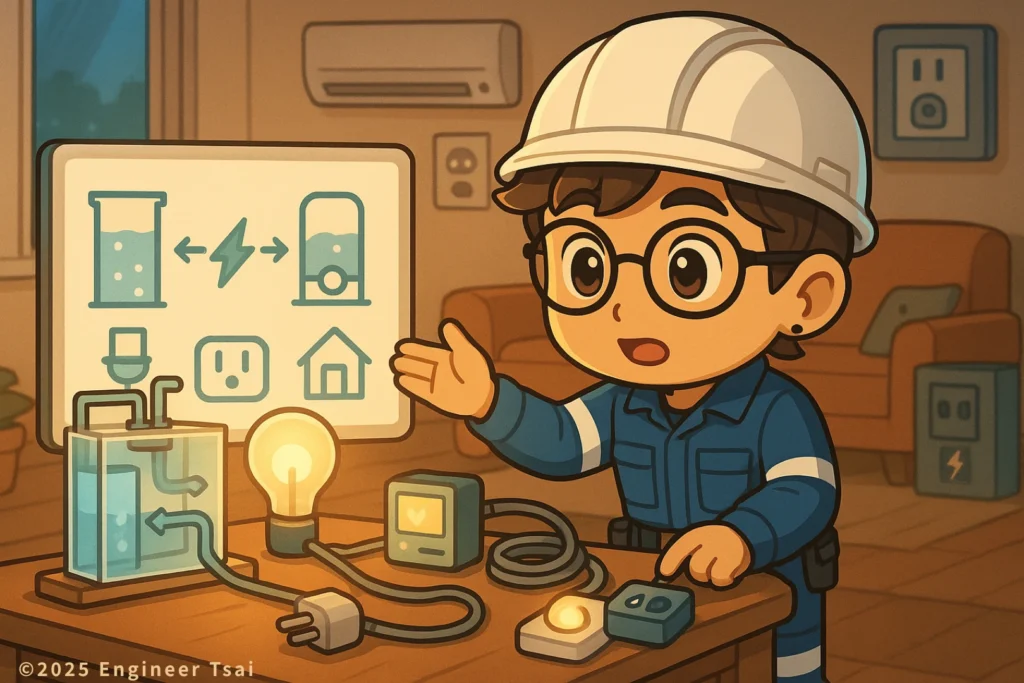
If you’re still building your foundation in basic electricity, start with this beginner-friendly overview: 🔹 “Electricity 101: The Complete Beginner’s Guide to How Power Really Works”
After reading it, the concepts in this article will make a lot more sense.
Watch first: how AC power is converted to DC – inside your charger
One-sentence explainer:
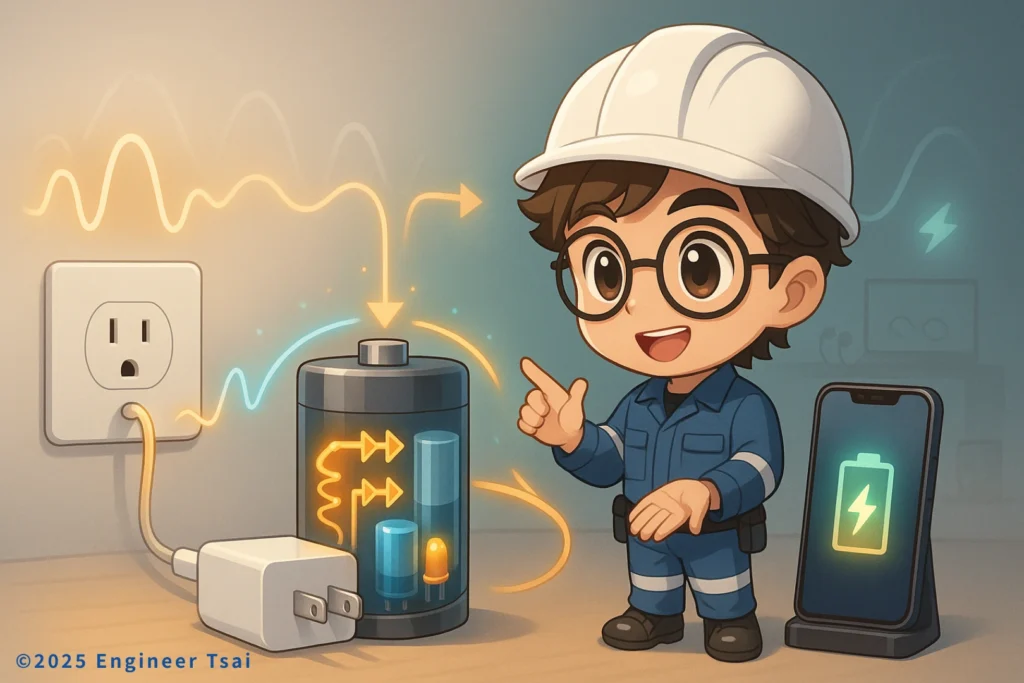
A charger is basically a tiny power plant that turns AC power from the wall into DC power your phone, tablet, or laptop can safely use.
In this guide, we’ll walk through how AC power is converted to DC inside a real-world charger, so you can actually picture the process instead of just memorizing terms.
In the short video above, I walk through what’s actually happening inside your charger – from the transformer and bridge rectifier, to the filter capacitor and voltage regulator. Step by step, you’ll see how AC power is converted to DC, and why some chargers feel fast and safe while others run hot and make you a bit nervous.
Why do we need to convert AC to DC in the first place?
In most homes, your wall outlets provide alternating current (AC) at about 120 V in North America (and 230–240 V in many other countries). But almost everything you plug in to charge – your phone, laptop, tablet, earbuds – actually runs on direct current (DC) inside.
If you send AC from the outlet straight into these delicate circuits and batteries, they either won’t work at all or they’ll fail in a very dramatic way. That’s why we need a “middleman” – the charger – whose job is to convert high-voltage AC from the wall into low-voltage, stable DC that your devices can safely use. Once you see how AC power is converted to DC along that path, a lot of charger specs suddenly become easier to understand.
What’s the difference between AC and DC power?
- Alternating current (AC): the current changes direction back and forth, and the voltage swings up and down like a sine wave. It’s great for sending power over long distances – this is what your utility delivers to your home.
- Direct current (DC): the current flows in one fixed direction, and the voltage is relatively steady. This is what batteries and electronic circuits are designed to use.
Put simply:
AC is ideal for delivering power, DC is ideal for using power inside electronics.
From the power plant to your home, the system mostly uses AC. Once electricity goes into a charger or power supply, it’s converted into DC so your devices can use it safely.
If you want the more formal physics definitions, you can check the articles on
alternating current and direct current.
How AC power is converted to DC: the basic AC-to-DC flow
A small charger is doing more than it looks. When you zoom in on how AC power is converted to DC inside that charger, you can break the AC-to-DC conversion process into four main stages:
① Step-down: turning “outlet-level” voltage into “electronics-level” voltage
A typical wall outlet gives you 120 V or 230–240 V AC, but most devices only need 5 V, 9 V, 12 V, or maybe 20 V DC.
A transformer (either a traditional iron-core transformer or a high-frequency transformer inside a switching power supply) first steps the AC voltage down to a lower, safer level.
② Rectify: making the current flow in only one direction
Next, a bridge rectifier built from diodes takes the AC waveform – which swings positive and negative – and flips it so the current only flows in one direction. At this stage, you get what’s called pulsating DC: the current no longer reverses direction, but the voltage still rises and falls in bumps.
③ Filter: smoothing out the “sawtooth” voltage
To make things more stable for your electronics, the charger adds a filter capacitor. When the voltage is high, the capacitor stores energy; when the voltage drops, it releases that energy. The result: the bumpy, pulsating DC gets smoothed out and starts to look like a fairly steady DC voltage.
④ Regulate: locking the output to exactly what the device needs
Finally, a voltage regulator IC or control chip takes over to lock the output at a specific voltage – 5 V, 9 V, 12 V, 20 V, and so on – while also watching the current. This stage makes sure the charger doesn’t push more voltage or current than your device can safely handle.
This last step is where a “good charger” and a “sketchy charger” differ a lot. Good chargers have precise regulation and safety margins; cheap ones may cut corners on control and protection.
The main components inside a charger, at a glance
If you were to take a charger apart (not recommended on the AC side if you’re not trained), you’d usually see a few key players:
- Transformer: steps 120 V / 230–240 V AC down to a lower AC voltage.
- Bridge rectifier (diodes): converts AC into one-direction pulsating DC.
- Filter capacitors: smooth out voltage ripple so the output is more stable.
- Regulator IC / control chip: keeps the output voltage (and sometimes current) within a tight range.
- Protection circuits: detect over-current, over-temperature, short circuits, and shut the output down when something goes wrong.
When these parts work well together, a charger can run for years without drama. When the design is cheap or rushed, you start to see symptoms like “charging is slow,” “the brick feels too hot,” “the phone screen starts to glitch while charging,” or in the worst case, a real safety hazard.
How can a charger “tell” different devices apart? What is fast charging really speeding up?
Smart charging and fast-charge protocols
Many people notice that the same charger behaves very differently with different devices. It might trickle charge a small gadget, but push a lot more power into a laptop. That’s not magic – it’s communication protocols doing the negotiation.
Standards like USB-C, USB Power Delivery (USB-PD), and Qualcomm Quick Charge let the charger and the device “talk” to each other:
- The device first tells the charger, “Here’s how much voltage and current I can safely accept.”
- The charger responds by picking an output profile (for example 5 V at 3 A, or 20 V at 3.25 A) that it can safely deliver.
That’s why the exact same USB-C cable sometimes sits at 5 V for a slow charge, and sometimes jumps to 9 V, 12 V, or 20 V for true fast charging.
Protection features: not just “charge fast,” but also “charge for years”
A well-designed charger doesn’t just focus on speed. It quietly watches several things in the background:
- Over-current protection: if the current gets too high, it limits or cuts off the output.
- Over-temperature protection: if the charger gets too hot, it reduces power or shuts down.
- Short-circuit protection: if the output is accidentally shorted, it kills the output almost instantly.
You can’t see these systems working, but they directly affect your phone’s long-term battery health – and how safe that little plastic brick is, sitting in your outlet all day.
Where do AC-to-DC converters show up, and where are they going next?
Everyday use cases
- Consumer electronics: phones, tablets, laptops, game consoles, wearables – these are the most familiar AC-to-DC scenarios.
- Renewable energy and home storage: home battery systems and solar inverters all have AC/DC conversion stages built in.
- Smart home gear: routers, smart speakers, security cameras, door locks, and hubs almost always run on low-voltage DC.
Future trends: smaller, faster, more efficient
- Wireless charging: no need to plug a cable in – just drop your phone on a pad. Efficiency and heat management are still being improved.
- GaN chargers: using gallium nitride (GaN) power devices, chargers can be much smaller and run cooler at the same power level.
- Greener design: higher conversion efficiency, less standby power, and more recyclable materials are big focus areas for the next generation of chargers.
A simple low-voltage experiment: feel AC-to-DC conversion in real life
If you’re a student, a parent, or just someone who’s curious about electronics, you can build a small, low-voltage AC-to-DC circuit to see the process with your own eyes.
Important safety note:
Only use an isolated low-voltage AC source (around 6–12 V AC from a lab transformer or module).
Do not work directly with 120 V or 230–240 V mains. If you’re not familiar with circuits, make sure a qualified teacher, technician, or electrician supervises you.
Materials you’ll need
- A low-voltage AC source (for example a 6–12 V AC lab transformer or module)
- A bridge rectifier (four diodes, or a single bridge rectifier package)
- An electrolytic capacitor (for example 1000 µF or larger, with a voltage rating above your test voltage)
- An LED plus a suitable series resistor
- Hookup wires and a breadboard
Step-by-step experiment
- Connect the low-voltage AC source to your breadboard and measure/confirm the output voltage.
- Build a bridge rectifier using four diodes (or drop in a bridge rectifier IC). The output will now be pulsating DC.
- Add a capacitor in parallel across the rectifier output and observe how the voltage becomes smoother.
- Connect an LED with a proper series resistor to the DC output and observe changes in brightness or flicker.
With this little experiment, the idea of how AC power is converted to DC stops being an abstract textbook diagram and becomes something you can actually see and measure.
FAQ: AC-to-DC conversion and charger safety
Q1. How does a typical phone or laptop charger actually turn AC into DC?
A household charger first uses a transformer to step 120 V / 230–240 V AC down to a lower AC voltage. A bridge rectifier then converts that AC into one-direction pulsating DC. Next, filter capacitors smooth the voltage, and finally a regulator IC locks the output to a specific DC level (such as 5 V, 9 V, or 20 V). That whole chain is how AC power from the wall becomes safe DC power for your devices.
Q2. Why can’t I plug my phone or laptop directly into AC from the wall?
The chips, batteries, and control circuits inside phones and laptops are designed for DC only, and usually at just a few to a few dozen volts. Plugging them straight into 120 V or 230–240 V AC would expose them to a voltage tens of times higher, swinging positive and negative. The result is almost guaranteed instant damage and a serious fire or shock risk.
Q3. Is it safe to use very cheap, no-name chargers?
The main question isn’t just “Does it charge?” – it’s “How safe is the way it charges?” Very cheap, unbranded chargers often have issues like poor insulation distances, simplified or missing protection circuits, and components that can’t handle heat over time. Short-term, you might only notice slow charging or extra heat. Long-term, there’s a real risk of electric shock or fire. It’s much safer to choose chargers with clear labeling and recognized safety marks such as UL, ETL, or CE, and from brands that take testing seriously.
Q4. Are GaN chargers really better?
GaN (gallium nitride) is a type of power semiconductor that makes high-efficiency power conversion easier. It lets chargers deliver the same power in a smaller size with less heat. That’s the big advantage of GaN. But safety still depends on the overall design and protection circuits – not just the material. A GaN charger from a reputable brand, with proper safety certifications and clear specs, is usually a solid choice.
Q5. If I want to experiment with AC-to-DC circuits myself, what safety rules should I follow?
Keep all experiments on the low-voltage side. Use an isolated 6–12 V AC source, add proper resistors and protection components, and stay away from mains voltage unless you are trained and qualified. Never open or modify chargers that connect directly to 120 V or 230–240 V AC. If you’re a student or beginner, always work under the guidance of a teacher, lab instructor, or experienced electrician.
Summary: understand AC-to-DC once, and you’ll choose chargers with a lot more confidence
From an engineering point of view,
a charger is a compact AC-to-DC power system:
it steps voltage down, rectifies AC into DC, smooths it with filters, stabilizes it with a regulator, and layers on safety and communication so different devices can “eat enough” without being over-stressed. Once you understand how AC power is converted to DC through each of those stages, the inside of a charger stops feeling mysterious.
Once you understand:
- why your outlets must use AC while your electronics must use DC;
- how a tiny charger hides transformers, rectifiers, filters, regulators, protection circuits, and smart protocols inside;
- and what you’re really risking with unmarked, uncertified chargers;
you’ll stop looking only at “wattage” or “does it say fast charge?” and start asking a more important question:
Is this a charger I’m comfortable leaving plugged in next to my bed every night?
Further reading
- Direct current vs. alternating current: what’s the real difference?
A plain-language guide that clears up AC vs. DC once and for all, plus where each shows up in everyday life. - Basic circuits: power source, conductors, and loads
A gentle introduction to the three building blocks of any circuit – great if you’re just starting to read schematics. - Inside your charger: voltage regulation and overload protection (coming soon)
A deeper dive into how regulators and protection circuits keep chargers efficient and safe. - How fast-charging really works (and what it does to your battery) (coming soon)
USB-PD and other fast-charge standards explained, plus their impact on battery life and user experience.
If this article helped you finally understand how AC power is converted to DC inside a charger
– and gave you more confidence when choosing chargers –
consider subscribing to the Engineer Tsai blog or YouTube channel.
I’ll keep breaking down the “invisible” details of electrical engineering in a way that fits into your everyday life.
Read next in this topic
- What Is Electricity ? Everything You Need to Know
- Current & Voltage for DIY Enthusiasts : Unlock the Basics
- AC vs DC: What’s the Difference and Why It Matters (From Phone Charging to 120 V Home Power)
- Basic Parts of an Electric Circuit (Power Source, Wires, Loads)
- Conductor vs Insulator: How Your Home’s Wiring Keeps You from Getting Shocked
- Ohm’s Law Explained: V = IR for 120V Home Circuits
- What Is a Resistor? How It Works, Types, and How to Choose the Right One
- Series vs Parallel Circuits: Simple Guide for Home Wiring (With Formulas & Examples)
- How Electromagnetic Wave and Electricity Shape Modern Technology
- What Is Voltage? Simple Definition, Everyday Examples, and Safety Tips
- What Is a Battery? How It Works, Types, and Everyday Uses Explained
- What Is Ampere’s Law? A Visual Guide to How Current Creates Magnetic Fields
- What Does a Capacitor Do? Uses, Energy Storage, and Everyday Examples
- Types of Electrical Wire: How to Choose the Right One for Your Home
- How AC Power Is Converted to DC: What’s Really Inside Your Phone Charger?
- Electrical Energy Conversion: How Energy Transforms for Everyday Use
- Magnetic Field and Current: The Core Relationship Behind Motors, Generators, and Wireless Charging
- How Do Magnets Work? From Fridge Magnets to Maglev Trains
- What Is Inductance? Inductor Basics for Real-World Circuits
- What Is Impedance? A Plain-Language Guide to Resistance, Inductive Reactance, and Capacitive Reactance